
ORDER GUIDE
This guide will walk you step by step through the process of getting
your media selected and scheduled!
PLEASE MAKE SURE HOME AND ENTRY METHOD ARE READY PRIOR TO THE APPOINTMENT
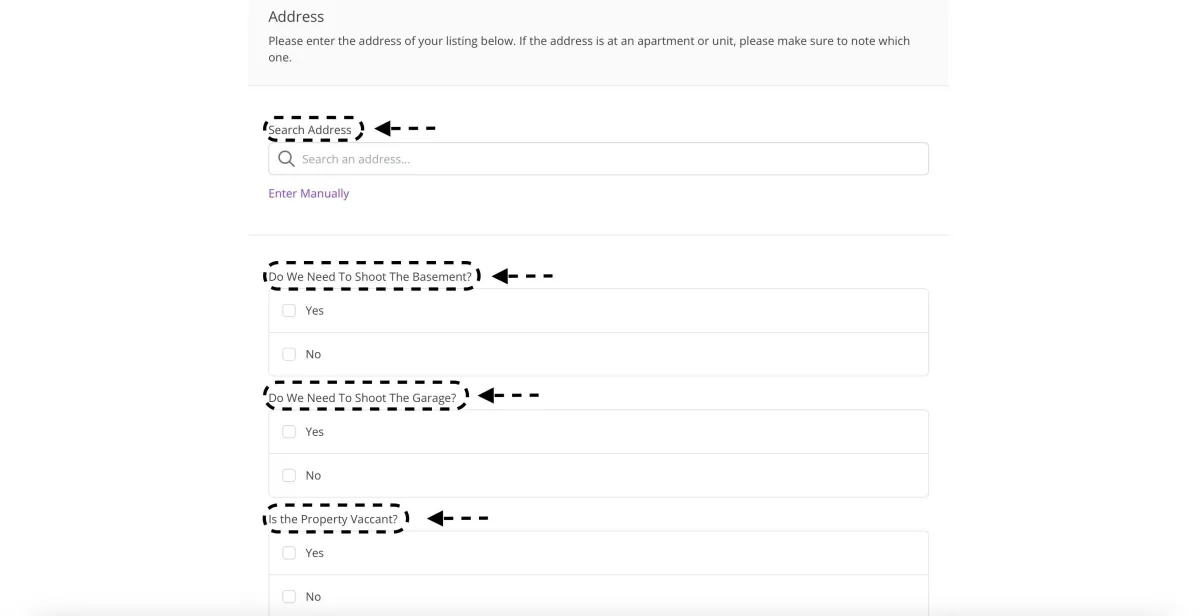
STEP 1 - Address
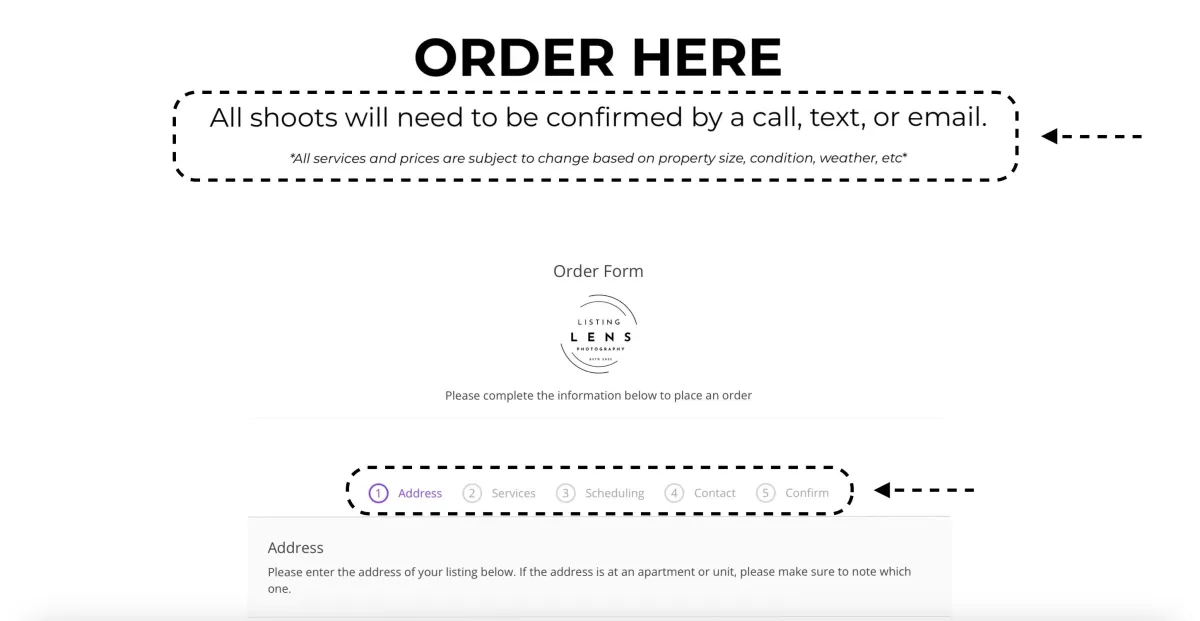
- Navigate to the order form via the order or login button at the top of the page
- Notice that all appointments need to be confirmed and are subject to change
-This is a 5 step process
- Proceed to fill out the questions on the first page of the form asking for address and other specifics
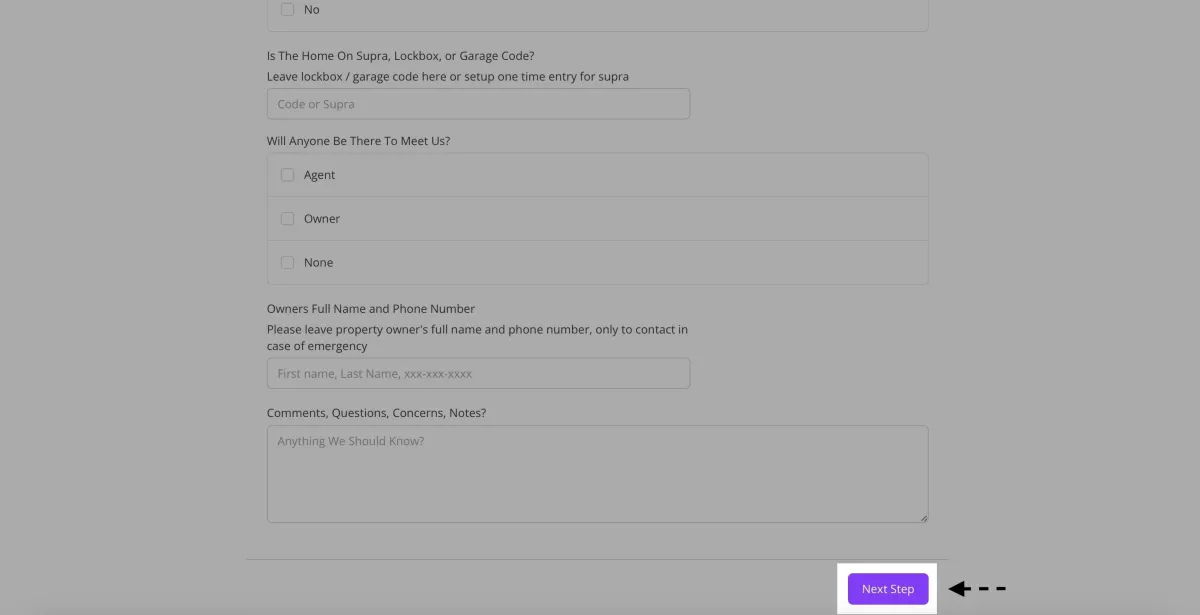
- Be sure to leave a code or some form of entry and make sure the home is ready to go
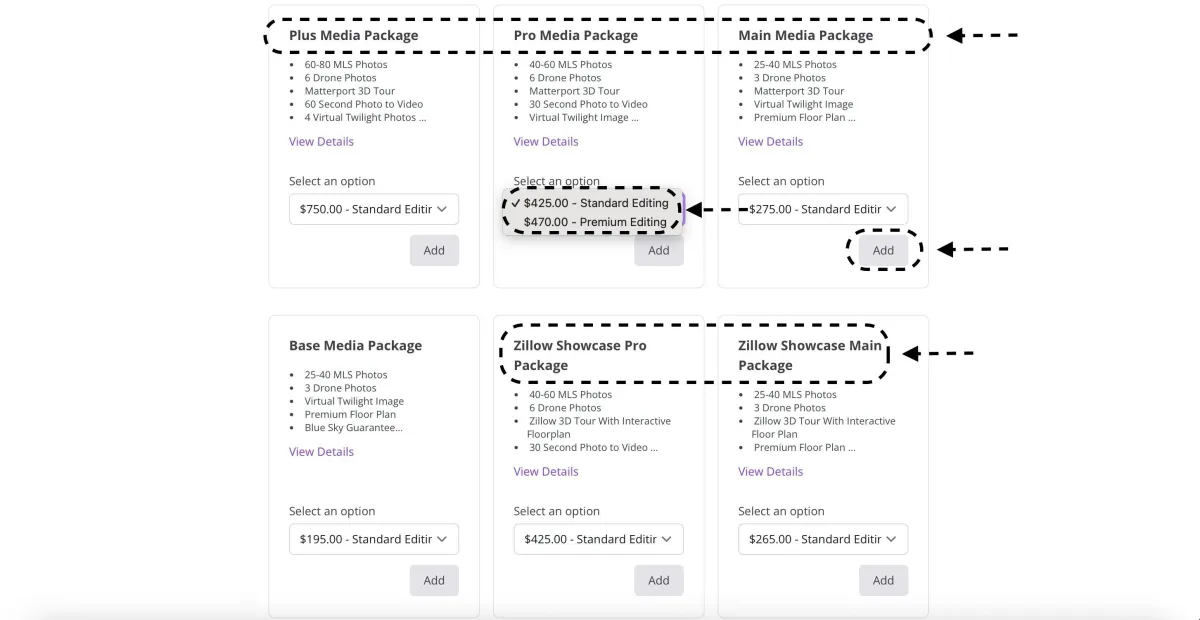
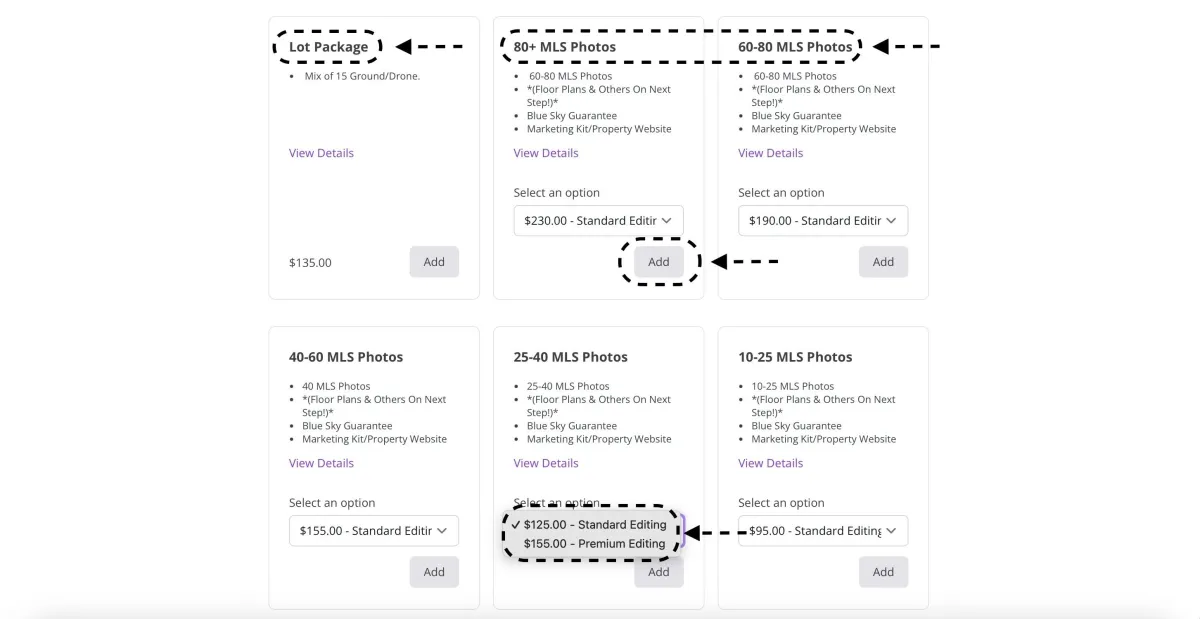
STEP 2 - Services
- Notice there are many packages some have Matterport, some have Zillow 3D Tours, some are for land etc
- Notice we also have individual services as well that you can order alone or use to build your own package
- Notice there are drop down menus for different editing or square footage options
-Find the service(s) you'd like, select from the drop down if needed, then press the add button below the service you'd like
then press the next step button
*There are add ons on the next page, a pricing page with all services laid out, and examples of services on the view our work page*
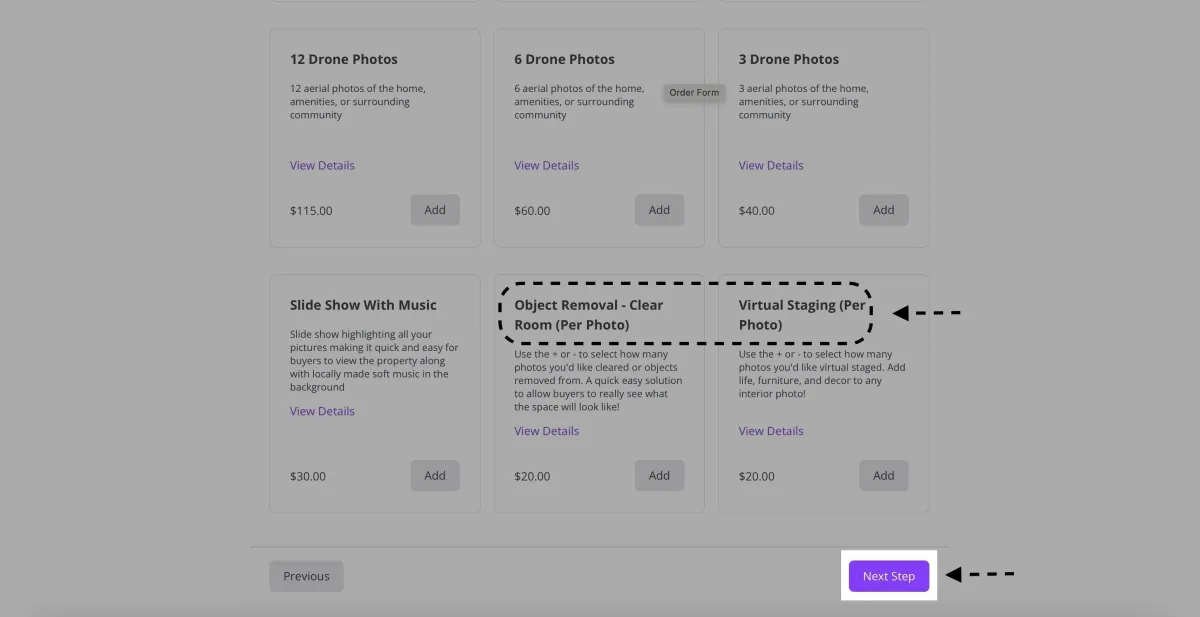
- You're now on the add ons page where you can add to your order what ever you'd like
-Notice we have photo, video, drone, 3D tour, and other services like virtual staging or object removal
-find the add on(s) you'd like, select from drop on if needed, then press the add button
-Once finished press the next step button
*If ordering virtual staging or object removal use the + or - to adjust to how many photos you'd like altered*

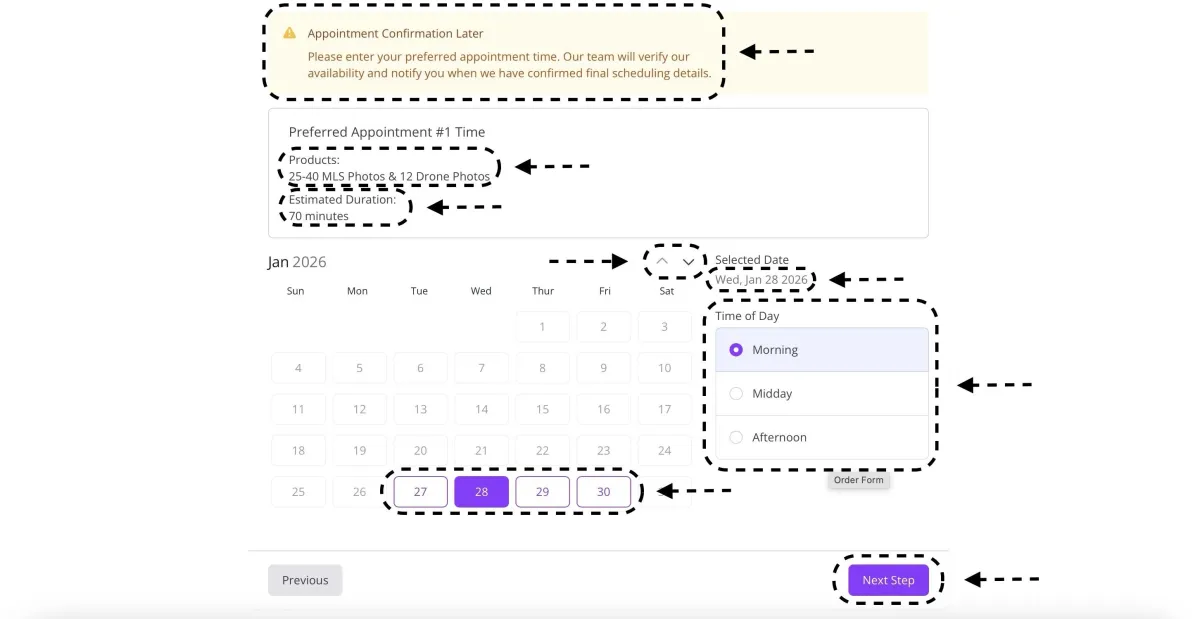
STEP 3 - Scheduling
- Notice this is not a confirmation, all appointments will need to be confirmed via text, email, or call
-Check to make sure all selected items are what you'd like to order
-While not always spot on check the duration to get a good idea of the time it'll take to complete
-Select the day and time you'd like to schedule for, use the arrows to move months, click on the purple boxes for the day, and the purple circles for time. Be sure to double check everything is correct and that the house is ready to go!
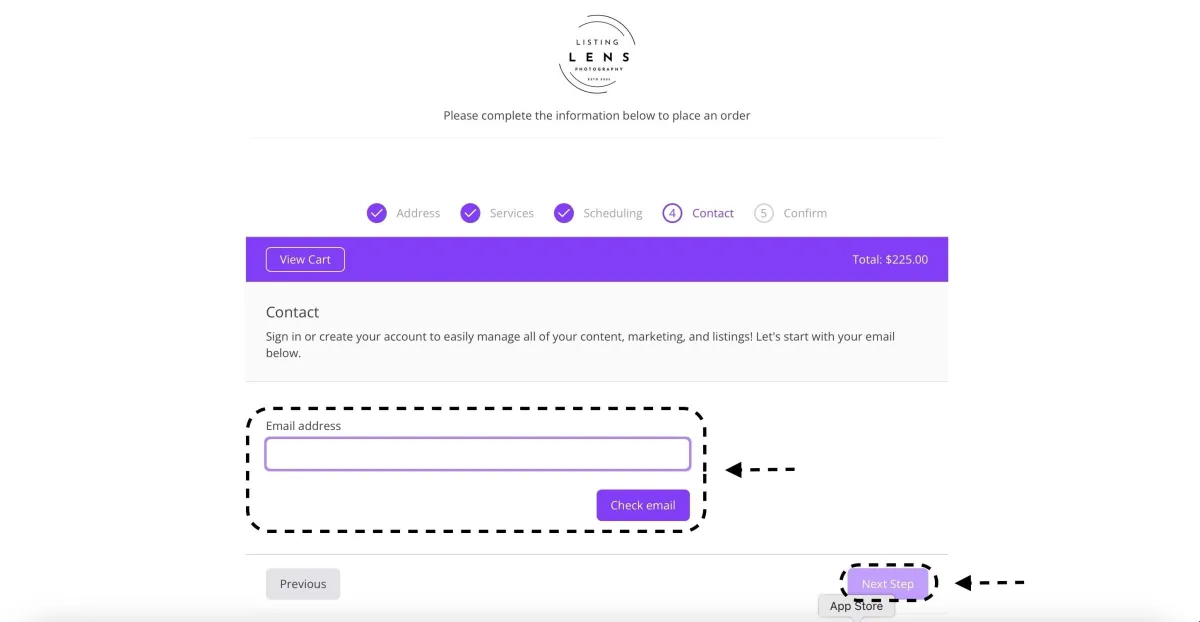
STEP 4 - Contact
-This is where you'll either make or log into your account, this is for two reasons. One so we'll be able to contact you and deliver your photos and Two you'll be able to access property websites, marketing materials, past orders, and pay in one place by using the login button at the top of the page.
-Enter your email then press check email, from there either make or log into your account, once complete you should see your name and info displayed, then press the next step button
STEP 5 - Confirm
-Check order details to confirm everything is correct
-Add promo code if there is one
-Press the submit button
*Now your order is placed, congratulations! Look out for a confirmation text, email, or call. You will access your media through an email or via the portal by pressing the log in button at the top of the screen. There you will pay, then you'll be able to download your media, and the property will be sold before you know it!!!

